
This week in Brooklyn Arts & Crafts we studied Henri Matisse. Aside from the fun inspiration to do The Hokey Pokey and a great board book by Susan Goldman Rubin, Matisse gave us the chance to focus on shapes! Our students love identifying shapes and colors at their age!! For this week’s card, we continued the fun from our main project’s potato stamping activity. Potatoes are the perfect size for our students’ little hands to manipulate. The children loved executing this card! Since both Passover and Easter are quickly approaching we cut egg shapes and triangles into the potatoes. Here’s our step-by-step how to.
Materials:
Potatoes, cut in half and carved
Card Stock & Envelope
Paint
Paintbrush

Before the kids get involved, cut a potato in half widthwise. With the tip of your knife carve out your desired shape into the inner part of the potato. Make your cut about one centimeter deep. Next, take your knife and cut into the side of the potato, roughly one centimeter down. Move your knife until it meets the cut you made in the top. Once the two cuts meet that part of your potato should pop out. When making shapes that require an interior cut, use the tip of a vegetable peeler for a more precise cut. You can go as basic or as intricate as your imagination (and skill level) will allow you. For our class project we made circles, squares, triangles, stars, and hearts. For the card we created eggs with zigzags, dots, and stripes.


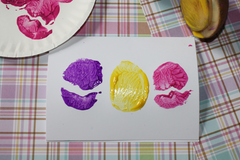
Now the fun begins! Have your child choose his or her favorite color paint and squirt some on a paper plate. You don’t need a lot of paint for this to work. It actually makes a better stamp if you dab off some paint before pressing the potato to the card stock. Then let your child stamp the design. For this card we used 3 different paint colors and 3 different potato stamps. To finish off the card, we simply painted a quick border around the edge using the same colors.


Sofia in action stamping her card!!

Here Sofia shows off her Easter card! We love the colors she chose and and the placement of her eggs!
When making our Passover card, we used a potato with a triangle cut into it. It is important to cut out the center of the triangle. To do this we cut into the potato with a knife and used the vegetable peeler to scoop it out. When making a Star of David, simply stamp one triangle with the point up then rotate the triangle so your next stamp has the point facing down. Don’t forget to add more paint between impressions. This could be rather tricky for a two-year-old, so we would advise helping them position their hand before pressing down.


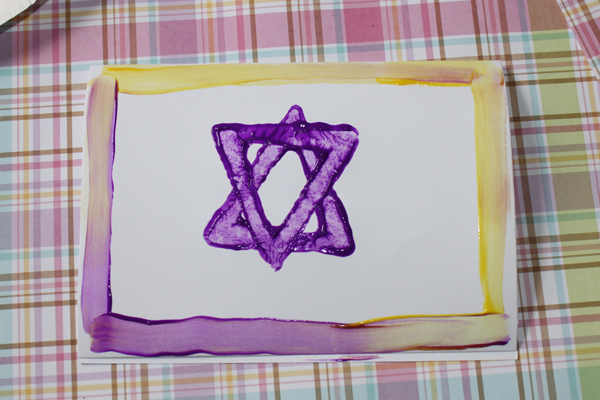

Leo showing off his Star of David Passover Card!!

We know you can't really see the card in this picture, but we couldn't resist posting it anyway. Oh, Leo and those dimples!!
Just as we did last week, don’t forget to draw a box around where the postage stamp should be placed on the envelopes. Our students knew exactly what to do with their postage stamp as soon as we gave it to them!! It’s also fun to ask your child who they want to mail their card to. They can really surprise you!

We hope this inspires you to have a potato craft afternoon soon!! Depending on the age of your youngster, it might be a good idea to let them create some freeform art in addition to the card. Our students loved the whole process: holding the potatoes, dipping them in paint, and stamping them all over their construction paper!! We hope your child has as much fun!!

Georgia showing off her art work from class!!