We did it! We have started our first official Project Life album!! The journey of our first month definitely went differently than we had thought, but I learned some things about myself and got into a grove.

Our Game Plan:
I went into this project full force. I was on a high from finishing our Summer Mini Album and I used that motivation to jump right into this bigger project. I started by taking the same approach that worked for the mini-album. I selected the photos, narrowed them down, and tried to map them out using post-it’s and sketches of the layouts I had planned to use. It was slightly overwhelming at first. I realized I take a lot of photos. My plan was to make one two-page spread for every week.

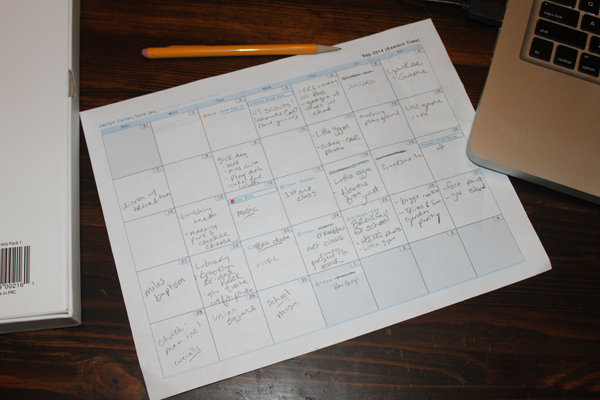
To help me focus I needed to get organized. I printed out my Google calendar for the month, pulled up iPhoto on the computer, and wrote down what we did each day. Once the photos were printed, I made paper pockets to keep things in order (just like I did when making Georgia’s SMASHbook). I put the post-it note on the front of the pocket & also bullet-pointed the main events of each week.


A Bump in The Road:
This is when I thought things would just fall into place. All I had to do was look at my sketch and slip the photos into the assigned sleeves. However, I kept feeling overwhelmed because all of my photos were being crammed into the album and I’d often have to omit photos I loved. There just wasn’t enough room and what I was looking at wasn’t “me.”

When I first told Chad about my love for the idea of Project Life, he told me he was surprised because he didn’t think of me as a “photo album person”; he thought of me more as an “artsy memory keeper.” I understood his point, but I loved the idea of creating these books as the year happens instead of putting it off or making just one for a specific event. I loved the idea of the memories of everyday life!!
Our Epiphany:
Then I took a step back. What did I want my Project Life album to say? How did I want to record this hectic life of ours? What did I enjoy doing?
First of all – I want to document the stories of our life. I set up my computer, looked at the photos on my desk, and started typing from my heart!
The next thing I want this album to do was to simplify our crazy life. During the week we are BUSY! We’ve got a lot of activities and we are always on the go! That’s how I was raised and that’s how I love to live life. I don’t want this album to emphasize our fast-paced lifestyle, I want it to help us slow down and enjoy! Similar to the reason I love Instagram, I want this album to remind me of how precious this time is and how grateful I am to have this life. That’s when I decided to forget limiting my weeks to one spread a week and focus on the activity. For the most part, each activity got its own one-paged spread, but I didn’t make this a rule and that freed me to just be creative. It also gave me room in each layout to include those stories, ALL the photos I love, the cute cards, and embellishments.
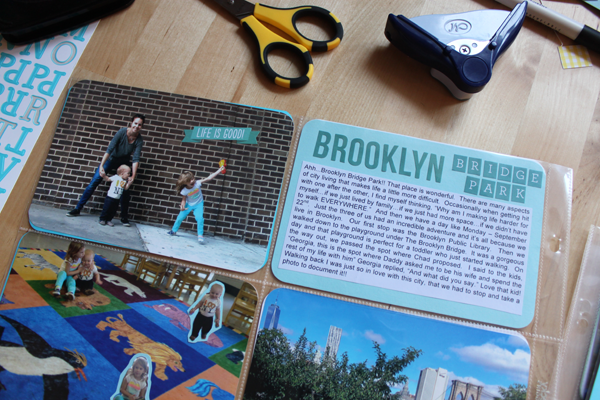
My spread went from looking like this….

To looking like this…

I came to the conclusion quickly that Chad was right. I am more of the artsy memory keeper. I like being messy…so I took my station from the desk to the floor. I laid out all my supplies, got my tools, turned on the music, sat Indian style, and put our book together. I was back in my element. I printed out the stories I had typed. I simply measured the width of the cards I planned to attach the story to, adjusted my margin in Word, printed it on regular computer paper, and glued it onto the card - nothing too fancy.

Finally- I still wanted to have the dates in there. I want to have a point of reference so that years from now when it’s all one blur I will know what date things actually happened. When I made the new spreads I didn’t focus on the dates - I just scrapbooked – keeping things relatively in the correct order. Then I used my Google calendar with all my handwritten notes and some Post-Its to go through and clarify the dates.

Now that everything was in place – I set myself up for the fun part. I moved back to the desk because it’s easier to stamp there. I pulled all the supplies I love and embellished each page. I didn’t want to overthink this, so I gave myself a time limit. I permanently added the dates using my Dear Lizzy date stamper, I drew a couple quotes and words with different sized Sharpies, and used an assortment of stickers I picked up at the craft store.

I am so happy with how the beginning of this album turned out. We have already looked at it together several times as a family and enjoyed the memories.
Here are a few general tips I found helpful while I scrapbooked with Project Life.
- It is easier to add elements to the pages if you work with the pocket pages NOT clipped into the album. This might be Project Life 101 but, for someone coming from scrapbooking with traditional albums, I started by using the pages clipped in the rings and found it difficult to add the cards when working on the reverse side.
- I used the diagram on the Project Life box to help me decide which layouts to use. It took me a little adjusting to get used to the bigger photo size – compared to the mini-album. Check back at the end of the year, I have a feeling I might prefer a mini-album, but we will see. I’m not making a decision yet!
- By focusing on one week at a time, I was able to keep moving along without getting too overwhelmed.
Now, what you've been waiting for...here are the first 8 two-page spreads of our Project Life 2014/2015 Album.
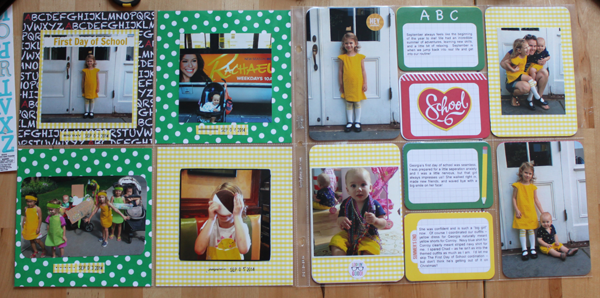
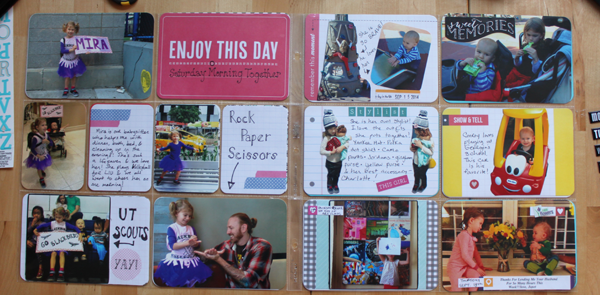
I used cards from a "School Themed" Project Life card set in addition to some scrap paper I had laying around. The first page highlights the week, the second page is focused just on the first day of school.

These two pages make me so happy. Both UT Scouts & the Yankee game were two of my favorite things we did this month. Letting each one have its own spread gives it the room to breath and allows us to celebrate each event.

The page on the left highlights Georgia's first "sick day." I used cute card stock and tried to focus on the positive. The page on the right is a little bit of everything. I love how it looks when a person is cut out of the photo. My favorite scissors to use for this are EK Success Bee Scissors.
When I originally made page on the left I wasn't able to include the photo of all the kids at the game. Giving this event its own page allowed me to get it out of the trash. I just love Conroy's face in that photo. The page on the right is a little bit from the whole week. I chose photos that would give you a sense of what was happening.
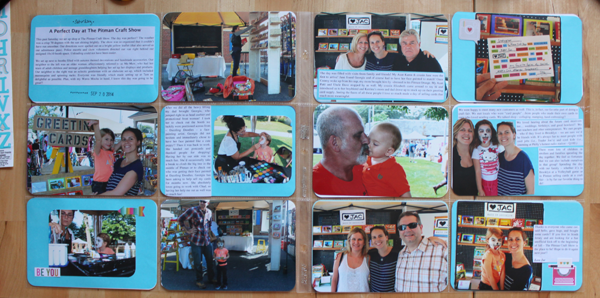
These two pages are highlighting The Pitman Craft Show. For these pages I printed out my blog post and glued in throughout the spread. I couldn't find a pre-bought card stock that I liked enough, so I used bright blue paper and cut it into 4x6 rectangles - rounding the corners with a punch.

The page on the left could have been made into two pages on its own, but I paired down the photos because even though I loved them all many of them were very similar. The page on the right is summary of the week. I used Snap! Stickers to stamp or write the day and date, and then put it directly on the photos.
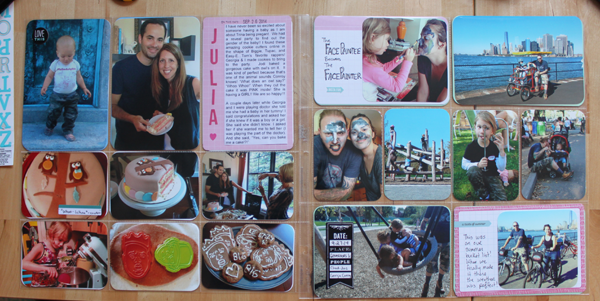
This is another example of two pages that make me happy. The left page is the day we found out my best friend is having a girl! The page on the right is the day we spent on Governor's Island. I used cards from the "Teen Girl Themed" Project Life card set.

For this final spread, I began to run out of 4x6 cards so I cut them out of card stock I had on hand. I kept them all green to help simplify the spread. I also used one card to handwrite the conclusion to the month of September.
Since this platform has been such a great place for me to put things out there and make them happen, here are three things I plan to do in the future.
- Include more quotes from Georgia. She’s at the age where everything she says is hilarious. I try to write them down, but often forget. I’m thinking about either carrying some cards with me or downloading a voice-recording app on my cell phone. Any suggestions would be greatly appreciated.
- Include more physical mementos - such as ticket stubs, post-cards, and other things I tend to hoard. This is the perfect place to keep them – why am I not? The SMASHbook format made it so easy to SMASH them into the album. I am determined to include them in the mix going forward.
- Include some daily Highs & Lows. Again - Highs & Lows are so “us” and we often do them at the end of every day. I want to make it a habit of jotting them down. Seriously – nothing sums up the day better.
Thank you again for reading and sharing this process with us. We are having a lot of fun and we are excited to get started on October memories. We hope this has inspired you to scrapbook your memories and we’d love to hear about your albums too!
2 comments
This is awesome! So creative and super helpful to held help me figure out my process!! Thanks!
I am visualizing your book at the end of 52 weeks! What a treasure for all time!!! It must take a lot of time and a lot of commitment to make this happen but what a unique gift to your family.